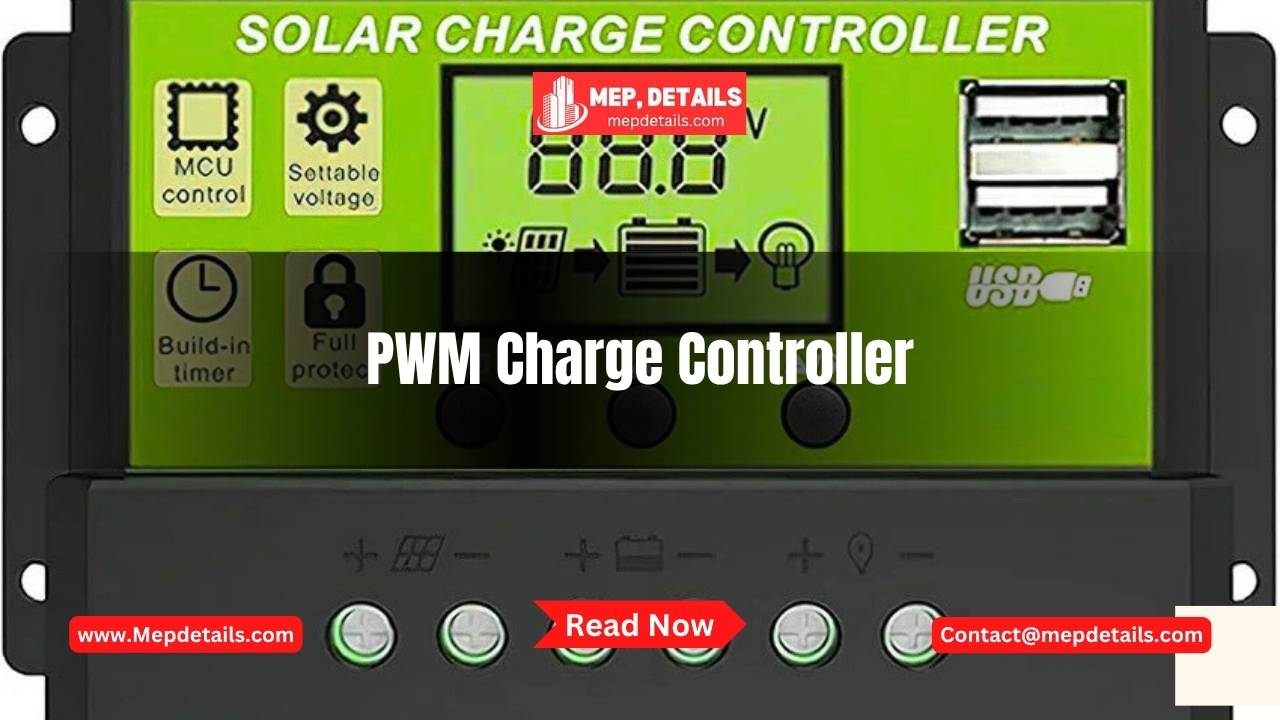
If your energy comes from solar, you must have a charge controller. A PWM charge controller allows you to control the charging of your battery from the solar panels. You don’t charge the battery too much or too little. It is important for this technology because it helps keep your battery healthy and long-lasting.
You will discover in this article how a PWM controller functions, why it is important and how to select one for your solar setup.
What Does PWM Stand For?
Pulse Width Modulation is what PWM means. By turning electrical energy on and off many times over, the technology controls its flow. A PWM charge controller uses this means to control how much current goes to the battery.
Rather than leaving the power to travel freely, the controller cuts the power into many small pulses. Adjusting the width of a pulse allows it to control the electricity. Doing this prevents the battery from becoming especially hot and charged too much.
Why Do You Need a PWM Charge Controller?
If you don’t have a charge controller, your battery can be damaged. Most solar panel systems output more voltage than your battery is designed to accept. A PWM charge controller keeps the battery safe by lowering the voltage and current moving into it.
Check out why it’s important to incorporate a PWM charge controller in your system.
- Prevents Overcharging: Current flow stops in the bank as soon as the battery is fully charged, according to the controller.
- Increases Battery Life: Safe and smooth steps for charging are controlled by it.
- Reduces Energy Loss: The presence of pulses in the system improves its efficiency over basic on/off approaches.
- Protects from Reverse Current: It does not allow power to return to the panels at night.
How Does a PWM Charge Controller Work?
Sunlight causes your solar panels to make electricity. All current from the panels goes through a charge controller to the battery. A PWM charge controller watches the voltage of the battery at all times. High battery voltage is regulated by the controller which lessens the load into the battery.
It does this by pulses instead of sending power all the time. The closer the battery gets to being fully charged, the shorter the pulses the controller sends. The process ensures the battery charges in a nice and safe way.
PWM Charge Controller vs. MPPT Controller
Some systems will use a charge controller called MPPT. Charging the battery safely is the main job performed by both MPPT and PWM types. Even so, they react differently.
If you run a small system, a PWM charge controller gives you a simple and affordable solution. It works best when your panel voltage matches your battery voltage.
Types of PWM Charge Controllers
PWM charge controllers are available in a range of different versions. Some of the usual ones are here:
1. Simple 1-Stage PWM Controller
The processor only reduces itself when the battery is full. Simply explained, it is most useful when systems do not use much power.
2. 3-Stage PWM Controller
There is bulk, absorption and float charging available of this kind. Control over power consumption will extend your battery’s life.
3. 4-Stage PWM Controller
The 4-stage version also includes an equalization step. The device equalizes the battery cells and lowers sulfation in lead-acid batteries.
Key Features to Look For
There are several features you should check when choosing a PWM charge controller.
1. Voltage Rating
Battery systems require the proper voltage for the controller. You’ll find common ratings in 12V, 24V and 48V.
2. Current Capacity
The total current generated by your solar panels should not be over the controller’s capacity. Always pick a speaker model that delivers more amps than your stereo puts out.
3. Display and Indicators
You will find models with LED or LCD screens on the market. They allow you to review the voltage, when your device is charging and how many charges your battery has remaining.
4. Battery Type Support
A few controllers are set up to use AGM, Gel, Flooded or Lithium batteries. Decide based on the type of battery you have.
5. Temperature Sensor
Every strong controller should have a temperature sensor inside. By checking the temperature, it automatically makes sure the right charging voltage is used.
Installation Tips
You will find that a PWM charge controller is easy to install as long as you have the right steps.
- Connect the Battery First: Be sure to connect the battery first when installing a solar system. This is how the working voltage of the controller is determined.
- Use Correct Wire Size: Use wires that won’t struggle with streaming the electrical current from your panels to the battery.
- Avoid Overloading: Don’t add more solar modules to the system than what your controller can support.
- Install in a Ventilated Area: Put the controller in a place that is cool and dry for maximum working condition.
- Secure the Connections: Always tighten electrical connections so that they do not get too hot or allow an electric short.
Maintenance Tips
You shouldn’t have to do much to keep a PWM charge controller, but occasionally checking on it helps it work and last well.
- Use a cloth without water to clean your controller often.
- Watch out for wires that have come loose or have signs of corrosion.
- Watch your display to see that your phone is being charged correctly and that it is working properly.
- Check how the system’s battery is working now and then by measuring the voltage.
When Should You Upgrade?
If you have a small system running well with a PWM charge controller, you may decide to upgrade if certain of these things apply:
- Put in more panels and your solar system becomes bigger.
- You want to see improved and faster recharging of your batteries.
- Your car should work better when it’s cold or cloudy outside.
If this happens, changing to an MPPT controller might be the answer. Even when you’re working on a simple or economical setup, PWM does the job well.
Conclusion
Whenever you build a small solar power system, a PWM charge controller becomes vital. It stops your battery from being damaged, prevents overcharging and helps your battery last longer. Because it’s both economical and easy to operate, anyone can try solar energy with this device.
Be sure to get the best model for your chemistry, voltage level and current demand. Installation should be done properly, the system must be kept clean and its functions should be regularly watched. Carrying out these steps will help your solar system run well and last years.
When you want a small solar system, a PWM charge controller is still a good, practical and low-cost choice.
Read More – How to Calculate the Right Size Battery for Equipment


